June 23, 2012: Updated pics!

Hey!  I took a trip out west for 1 week to sunny California (although from what I hear, it was very hot in New Jersey for the last week with temps. reaching into the 100s?!).  Anyway, I came back and saw a lot of growth in all of my gardens (vegetable, flowerbed, walkway and container).  I took a few pics just to show the dramatic fruit and vegetable growths in a period of 1 week!  There is a group of strawberries which will soon be ready to pluck.  The tomatoes are in full effect, but the weight of the fruit is pulling down on the stems.  Therefore, I tied some stems along the fence to train them.  The ichiban eggplants are growing strong.  A variety of peppers can be seen, and some may be ready to pluck.

As for the flowers, A LOT of stems have emerged from the container garden (which is a good sign, as I originally thought they would not grow).  As for the flowerbed, I see small stems, but I cannot discern if they are from bulbs or simply weeds.  We will just have to wait and see.  Anyway, check out the pics below!
Strawberries.

Peppers.

Bell pepper.

More peppers.

Ichiban eggplants.

Summer squash.

Summer squash.

Beastly tomatoes!

Okra.

Corn stalks.

Overall view.

Flower pot.

Flower pot.

And another flower pot with emerging stems.


6/15/2012: Updated photos!

Hey guys!  I have some updated pics to share with you.  A lot of the vegetable plants are in the early stages of producing fruit.  I took some great shots of the fruits budding from the stems.  Also, some of the flower bulbs in my container garden are starting to emerge from the ground.  I can see immature leafing and stems erupting from the soil.  Looks very promising.  Check out the pics below!

Bunch of tomatoes.

Tomatoes.

Eggplants.

Peppers.

Peppers.

Peppers.

Peppers.

Mint leaves.

Squash flower.

Emerging flower plant.

Emerging flower plant.

Emerging flower plant.

Emerging flower plant.

June 13, 2012: Weeding, cleaning and maintenance.

Today, I noticed that my garden was growing rampant with weeds and other invasive plants (I was expecting this to occur).  Visually, it seemed like there was A LOT of unwanted shrubbery, almost as if my garden was taken over by these plants.  However, upon closer inspection, it was about 1-2 very large plants encompassing each vegetable plant.  No big deal.  It was very easy to pull out the weeds, but it sure did take a lot of back-breaking labor!  You can make your task easier if you wait until ample rain has hit your garden.  This will keep the soil moist and loosen the earth so that you can pull out the weeds with ease.  It rained the past few days, so it seemed like a good time to start weeding and maintaining my garden.  I simply applied finger force at the base of each weed stem, and it came right out.  Everything looks very clean now.  Check out the pics for some before and after shots!

Walkway garden: before weeding.

Walkway garden: after weeding.

Beastly tomatoes!

Before weeding.

After weeding.

Before weeding.

Before weeding.

After weeding.

June 9, 2012: More container gardening.

Since Home Depot was having a flower bulb sale, I capitalized on the 50% off discount and purchased a few more exotic looking flowers.  I did the same as my previous post and purchased the containers from a local dollar store (18 containers for about $22, some cost more than others).  In total, my entire container garden required only 4 cubic feet of Sta Green garden soil (2 bags).  Not bad, right?  Since they are all perennials, I am hoping to grow these flowers for years to come.  Check out the pics below!

Bulbs overview.

The containers.

The final product.

Dahlia Humpty Dumpty mix.

Dahlia Rosella.

Gladiolus firecracker.

Dahlia vancouver.

Dahlia Thomas Edison.

Dahlia kalinka.

Dahlia color spectacle.

Gladiolus wine and roses.

Gladiolus dynamite II.

Dahlia sky angel.

Freesia single mix.

Dahlia jumbo mix.

Ixia mix.

June 8, 2012: Preparing a container garden.

Hello!  In addition to my vegetable garden and raised flower bed, I looked into container gardening and became interested in creating my own.  I wasn’t sure if container gardening may be suitable for flowering plants, especially since the bulbs and rhizomes require much room for root development and growth as well as adequate water drainage.  The onset of disease may also be an issue, especially for flowers.  Naturally, in-ground planting may be a more suitable way to go.

However, after a little research, I realized that with proper care and maintenance, container gardening can be successful and add a significant aesthetic theme around the home.  I decided to go for it.  I started out by purchasing 4 different flower bulbs from Home Depot (on sale for 50% off).  I also purchased about 8 planting containers from a local dollar store for about $12 total (some were more than $1).  It was as simple as dropping the bulbs into the container and filling them to the top with garden soil (instead of potting soil, since I’m keeping the containers outside).  Anyway, check out the pics below!

Dahlia Hawaii and Dahlia penelope.

Dahlia cactus mix and Dahlia dinnerplate mix.

I’ll split these 4 packs of bulbs into these 8 containers.

The finished product…

June 6, 2012: Updated photos of my vegetable and flower gardens.

Hey!  I just took some quick updated photos to show you the progress of both my vegetable and flower gardens.  It seems to be coming along very well.  I am now watering in about 8 gallons per day for each of my gardens.  I also have my first tomatoes and peppers growing in nicely!  An eggplant flower just bloomed and I expect to see one sometime next week.  My mini walkway garden is also showing promise, as the squash and okra leaves are enormous!  The corn stalks, although a bit overcrowded, are coming in very nicely as well.  In addition, I forgot to mention that I planted some mint leaves for my mom, and they have grown very generously.  She uses these leaves to make green chutney and other Indian dishes.  As for the flowers, they are blooming beautifully and showing vibrant colors.  Don’t believe me?  Check out the pictures below!

June 6, 2012 vegetable garden.

The peppers.

My first peppers!

A strawberry flower.

An eggplant flower.

My first tomato!

A tomato plant, about 3 feet tall.

Tomatoes section.

Mint leaves. My mom uses them to make green chutney.

Squash plants from walkway garden.

Okra plants from walkway garden.

Corn plants from walkway garden.

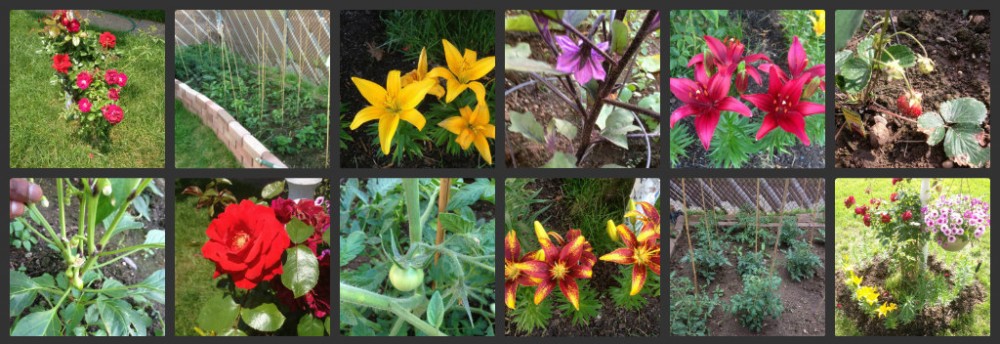
Front yard. All 4 lilies are starting to bloom.

Close-up.

Close-up.

Close-up.

Close-up.

Annual hanging basket photo 1.

Annual hanging basket photo 2.

Annual hanging basket photo 3.

A blooming rose.

The same rose, just 24 hours later!

June 2, 2012: Choosing bulbs for the raised flower bed.

Gallery

This gallery contains 18 photos.

Deciding which flowers to plant in my raised flower bed was a tough task to accomplish.  There are so many possibilities and combinations!  However, I had to keep the “economical” part of my tagline in mind.  I chose to go … Continue reading

June 1, 2012: Preparing a raised flower bed and extension.

I think I’ve caught garden fever… … … because I’ve decided to build an extension for a raised flower bed right beside my vegetable garden!  Awesome, right?!  I had nothing else to do, so I utilized some of the unused bricks I had laying around and built an extended wall to accommodate a raised flower bed.  This time, instead of tilling the lawn underneath, I simply added soil and lawn clippings (for natural fertilizer) on top of the lawn.  I’ve never done a raised garden before, so I thought this would be a great experiment.  Anyway, check it out.

The wall extension for my flower bed.

Topped with lawn clippings for natural fertilizer.

Top soil plus garden soil.

Raked in soil plus lawn clippings.

Some more garden soil.

I added 10 more bags of top soil and mixed everything in.

Here’s a closeup shot.

May 31, 2012: Planting of the rose bushes.

Here’s the new workspace for my rose bushes.  I will plant them alongside the fence so that when it matures, it will create a nice border of various colored roses.  The hardest part of planting these roses is the arduous task of digging into the ground.  You MUST dig at least 1.5-2 feet into the ground to allow for proper water drainage.  It was somewhat difficult, as I kept hitting large stones which I needed to clean out.  Basically, I dug 2 feet deep and about 1.5 feet in square dimensions for each rose bush.  Then I took the soil and tilled it until it showed the same consistency as store-bought garden soil.  I dropped in the rose bushes and filled in the holes.  I also purchased 7 bags of cheap top-soil from Home Depot (on sale for 0.98 cents for a 40 lb. bag!).  I split each bag to cover the top portions of each rose bush hole and created a nice mound on top for each plant.  I watered in heavily for the first watering (about 2 gallons per rose bush).  Check out the pictures below!

The workspace.

It’s not a joke digging these holes!

Planted and topped with soil.

1 of the 14 rose plants.

May 27, 2012: Vegetable garden photo update (part 1 of 2).

Hello everyone!  I took a few shots of my garden to show you guys how well it’s coming along.  I use 4-6 gallons of water every morning for my vegetable plants.  I also added these bamboo stakes to provide support for the plants (I believe they are about $2 from Home Depot for a pack of 6).

Tomatoes.

Eggplants.

Peppers.

Strawberries.

May 27, 2012 overall snapshot.